Hostinger now offers a one-click OpenClaw installer that takes you from zero to a running AI agent in under five minutes. No terminal commands, no dependency management, no Docker configuration. You click a button, connect Telegram, and OpenClaw is live on a VPS that runs 24/7 whether your laptop is open or not.
This guide walks through the entire process from creating a Hostinger account to watching OpenClaw boot up for the first time. We recorded a full video walkthrough and pulled every step from it so you can follow along at your own pace.
If you already have OpenClaw running locally and want to understand the full configuration (workspace files, memory, heartbeat, skills), read our 10-step OpenClaw setup guide instead. This guide focuses on the hosting and deployment side.
VPS Hosting vs. Running OpenClaw on Your Laptop
OpenClaw’s most powerful features depend on it being always on. The heartbeat fires every 30 minutes. Cron jobs run on schedule. Your Telegram bot responds instantly, even at 3 AM. None of that works if OpenClaw dies every time you close your laptop lid.
A VPS (Virtual Private Server) solves this by giving OpenClaw its own dedicated machine in the cloud. Hostinger’s one-click setup removes the usual VPS friction: no SSH, no manual Node.js installs, no process managers to configure.
| Factor | Local (Laptop) | VPS (Hostinger) |
|---|---|---|
| Uptime | Only when laptop is open | 24/7, always running |
| Setup | Terminal commands, manual dependencies | One-click from browser |
| Monthly cost | $0 (your own hardware) | ~$12/month |
| Heartbeat & crons | Stop when you close the lid | Run continuously |
| Telegram response | Only when laptop is awake | Instant, any time |
| Maintenance | You manage updates | Hostinger handles server infra |
For anyone who wants OpenClaw to function as a genuine digital employee rather than a tool you use during work hours, a VPS is the right move.
What You Need Before Starting
- 10 minutes of your time
- A payment method (credit card or PayPal) for the Hostinger plan
- A Telegram account (free, on your phone)
- Optionally, a ChatGPT subscription ($20/month) if you want to hook it up as an add-on during setup
That is it. You do not need Node.js installed, a terminal, or any technical background. Hostinger handles the server side.
Step 1: Create a Hostinger Account
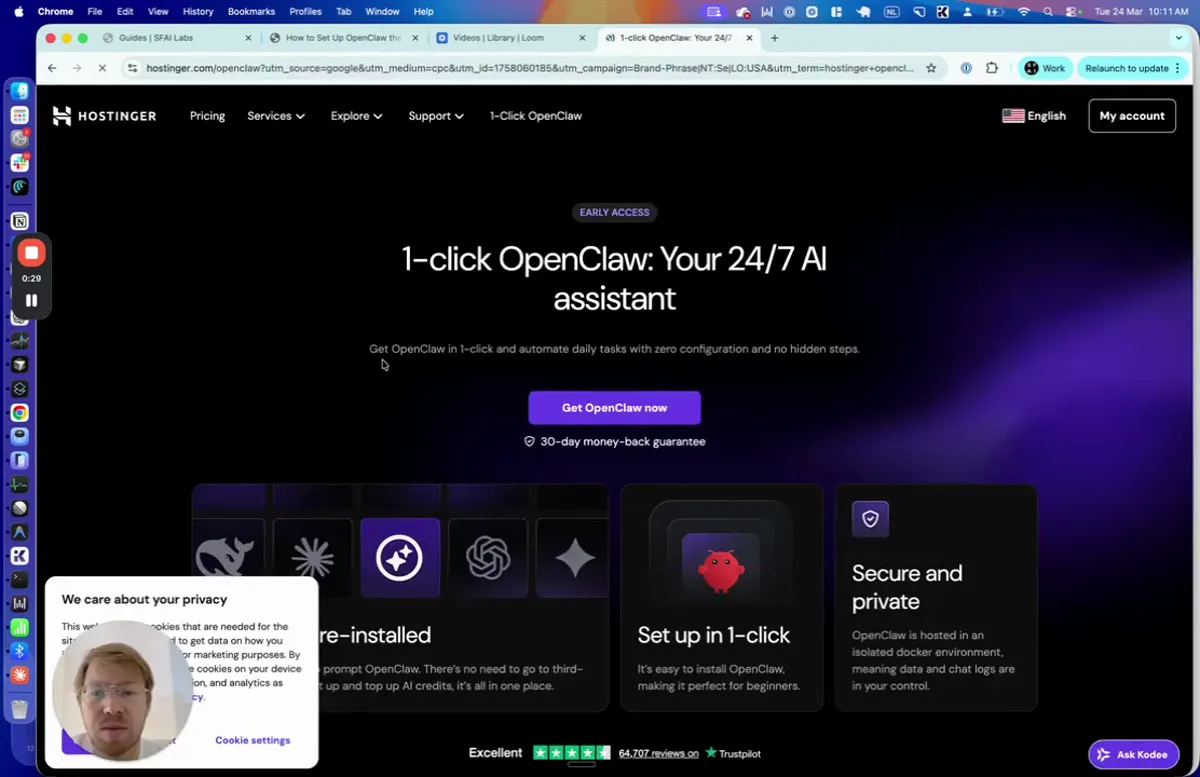
Go to Hostinger and navigate to their OpenClaw landing page. You will see the “1-click OpenClaw” product page advertising the one-click AI assistant setup.
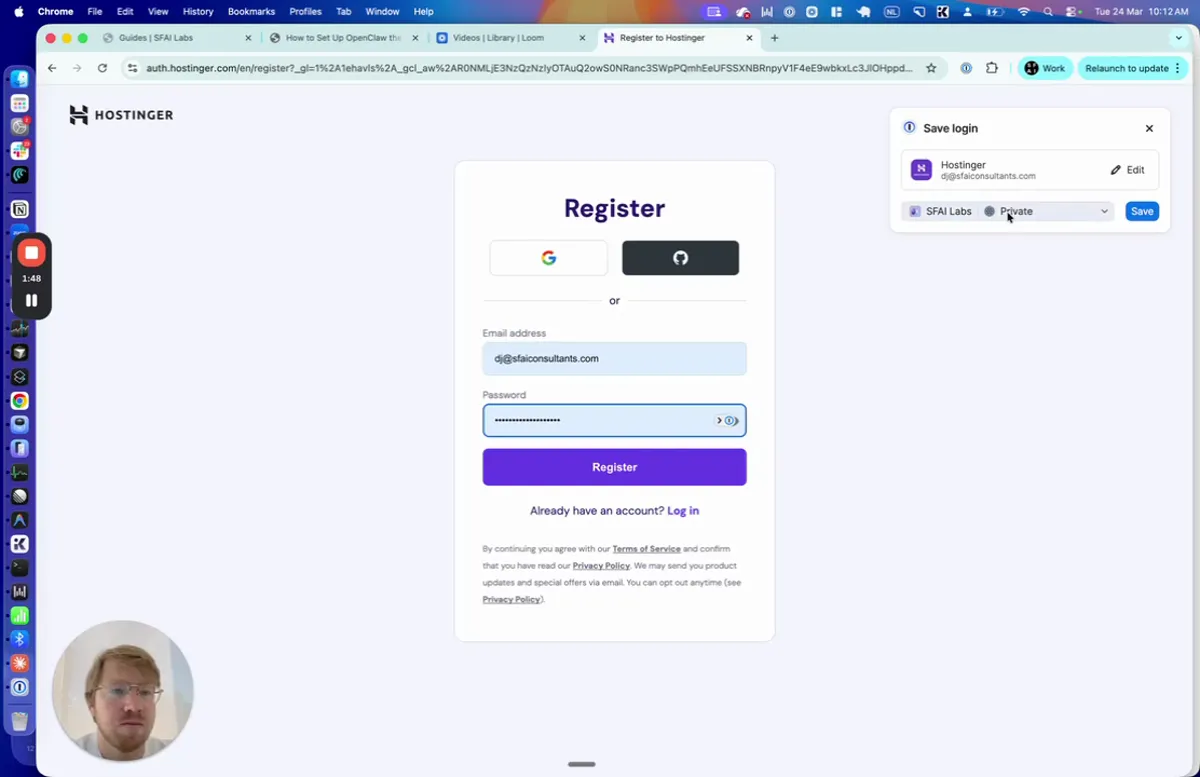
Click Sign Up or Register if you do not have a Hostinger account yet. Enter your email address and create a password. If you already have an account, log in instead.
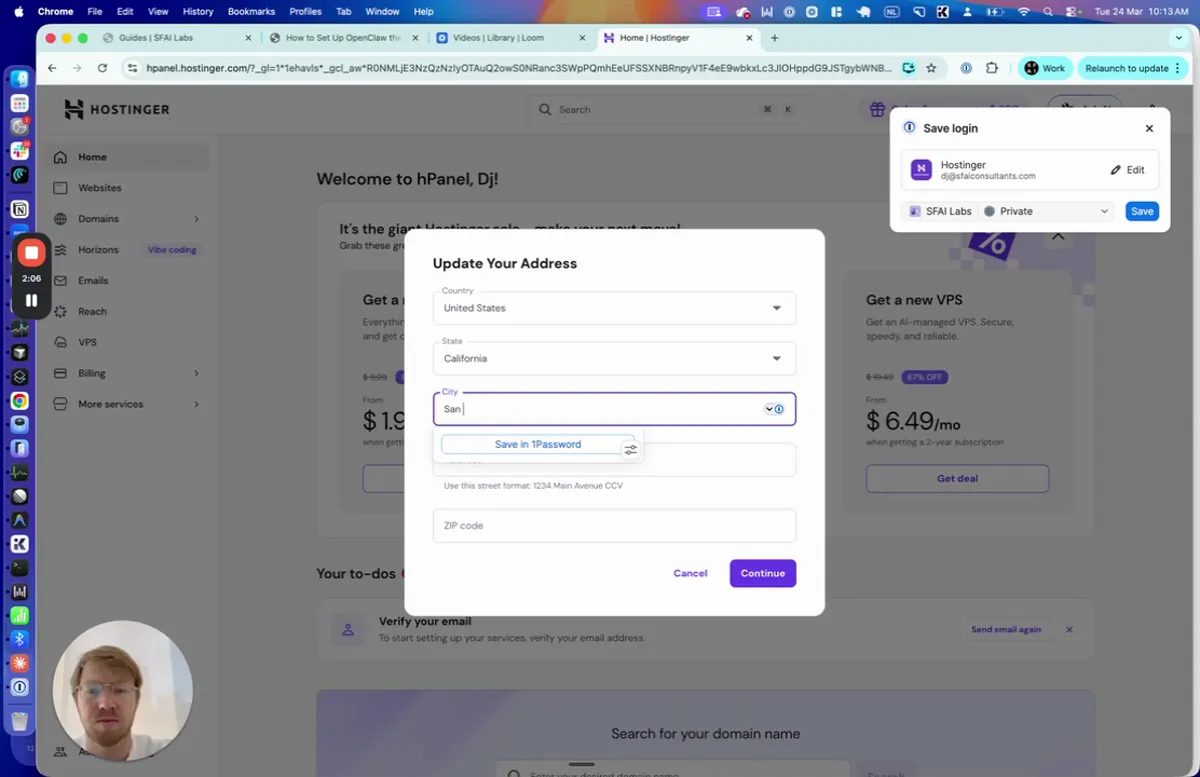
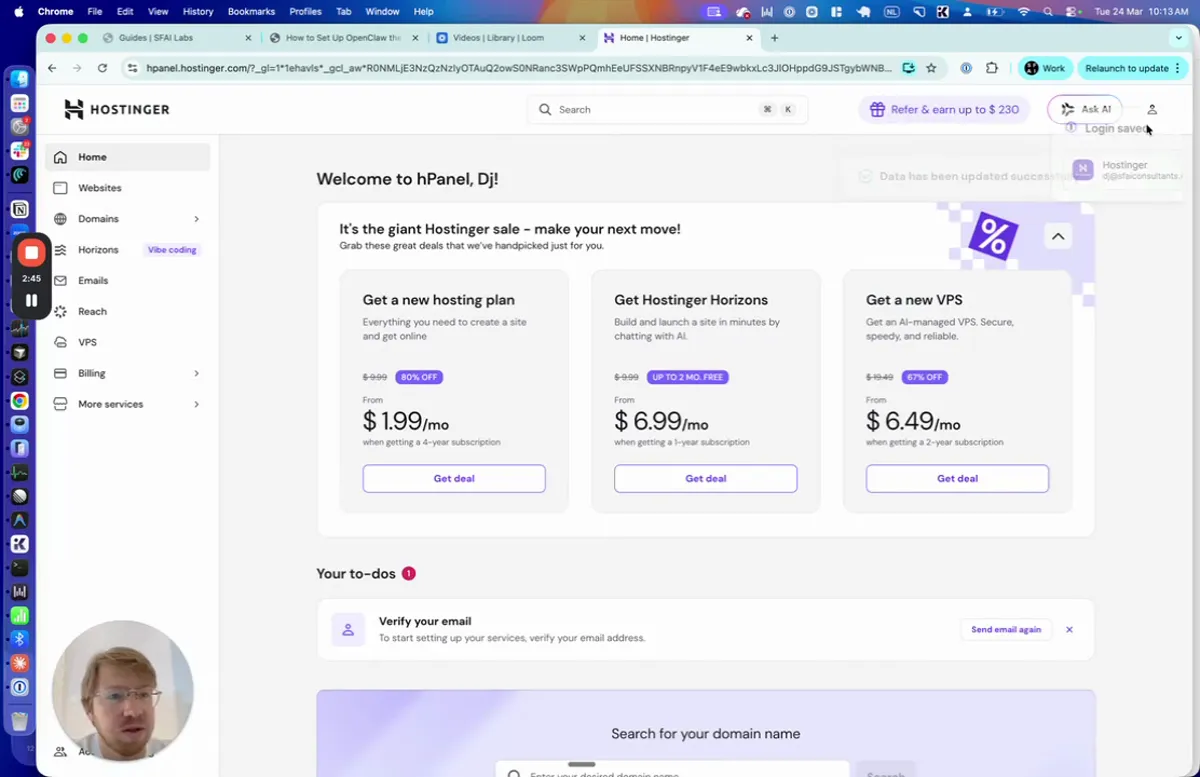
After registering, Hostinger will ask you to update your address for billing purposes. Fill in your details and click Continue. You will land on the hPanel dashboard.
Step 2: Find the One-Click OpenClaw Install
Once you are in the hPanel dashboard, you will see Hostinger’s product offerings. The welcome page shows different hosting options with their pricing.
Navigate to the main Hostinger website and find the 1-click OpenClaw product page. You can reach it by searching for “OpenClaw” in the navigation, or by going directly to the OpenClaw section under the VPS category.
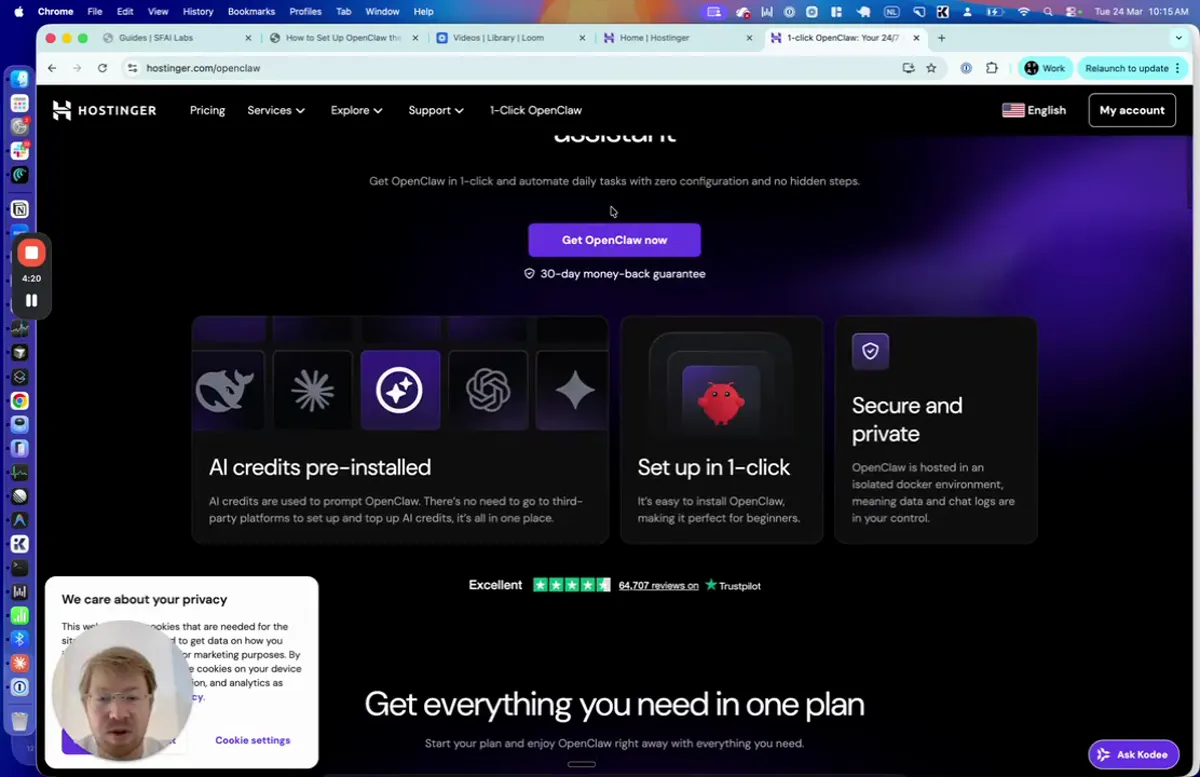
Click Get Started Now (or Get OpenClaw Now) to proceed to plan selection.
Step 3: Select Your Plan and Review Pricing
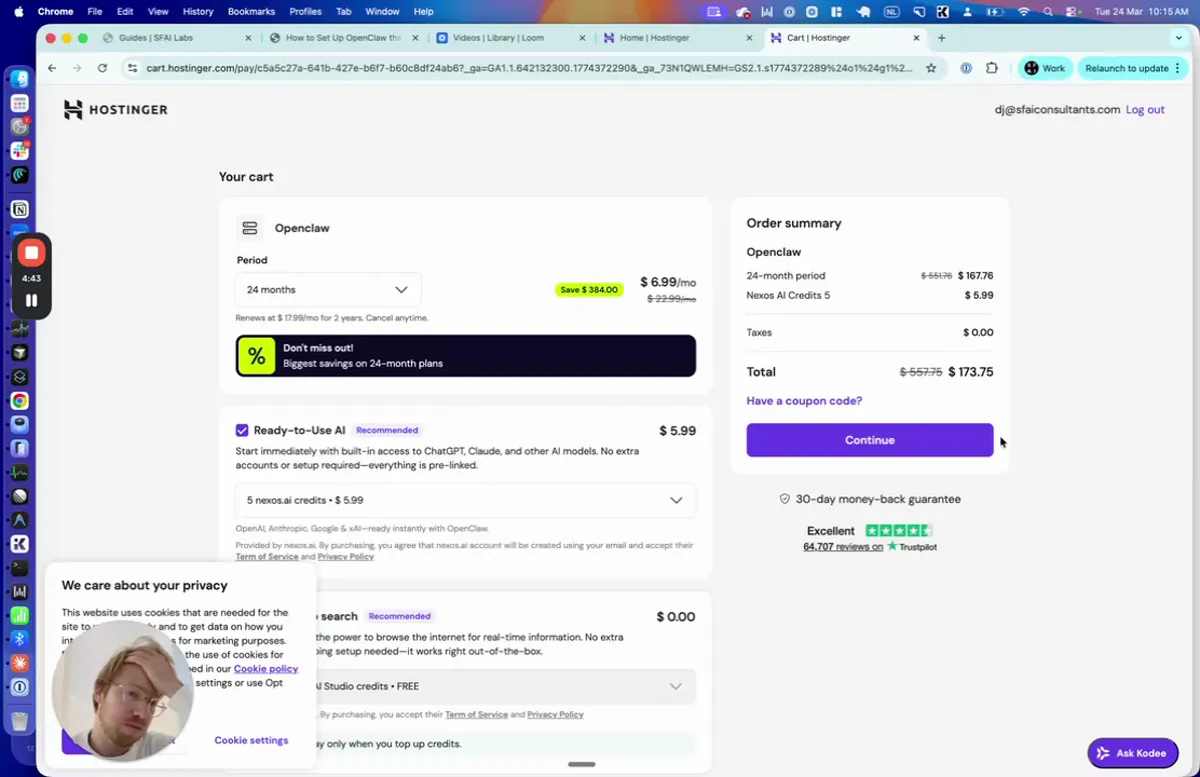
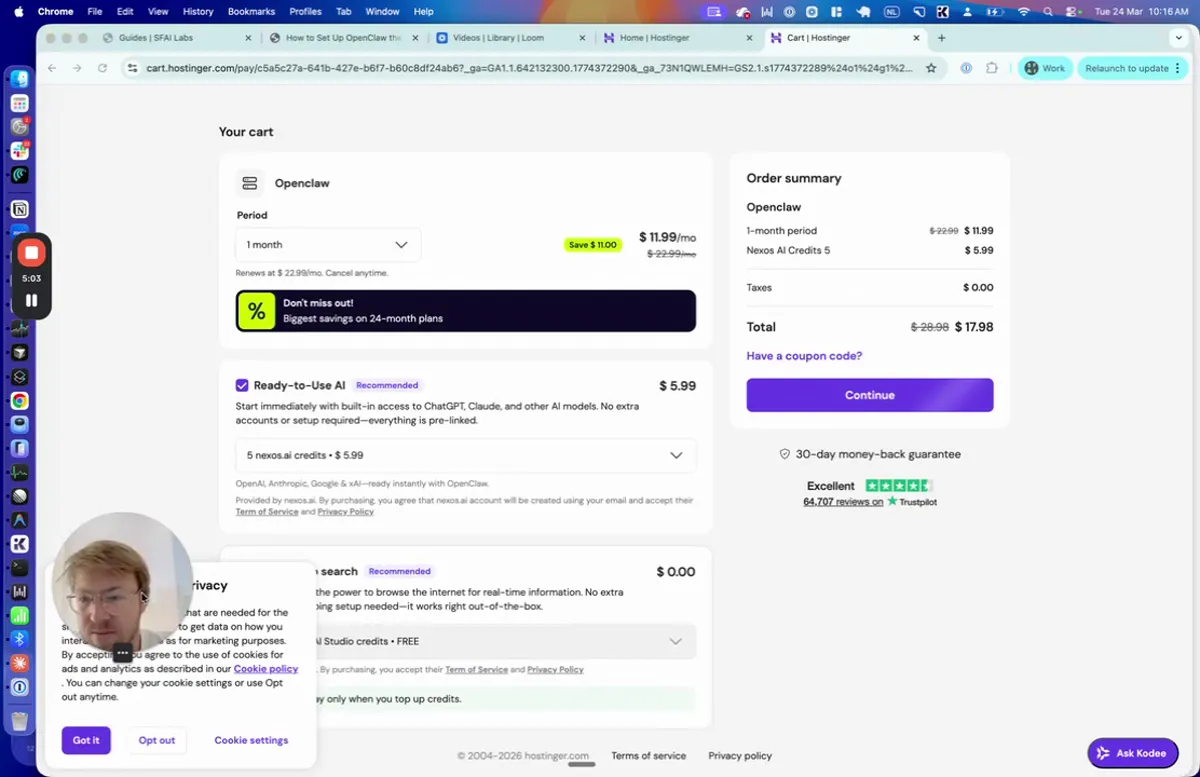
Hostinger adds the OpenClaw plan to your cart with a full pricing breakdown. The base price shown is $6.99/month as an introductory rate. The renewal price is $18/month after the initial term.
Pricing Breakdown
| Line Item | Amount |
|---|---|
| OpenClaw VPS (intro rate) | $6.99/month |
| Renewal rate (after intro period) | $18.00/month |
| Effective average cost | ~$12/month |
The effective cost depends on how long of an initial term you select. Longer commitments get a lower introductory rate. For most users, the 12-month plan offers a good balance between commitment and savings.
Step 4: Choose Your Add-Ons
Before checkout, Hostinger offers optional add-ons. The most relevant one is the ChatGPT subscription hookup, which connects your existing OpenAI subscription to your OpenClaw instance.
If you already have a ChatGPT Plus subscription ($20/month), select this add-on. It lets OpenClaw use your subscription through the OAuth method, which means you pay a flat monthly rate instead of per-API-call pricing. For context on why this matters and how to set up backup models, see Step 4 in our full OpenClaw setup guide.
Once you are satisfied with your selections, proceed to checkout and complete the payment. The total for the first billing period comes to approximately $18 depending on your selected add-ons and billing term.
Step 5: Connect Telegram and Create Your Bot
After payment, Hostinger drops you into the OpenClaw setup wizard. The first configuration step is connecting Telegram so you can communicate with your agent from your phone.
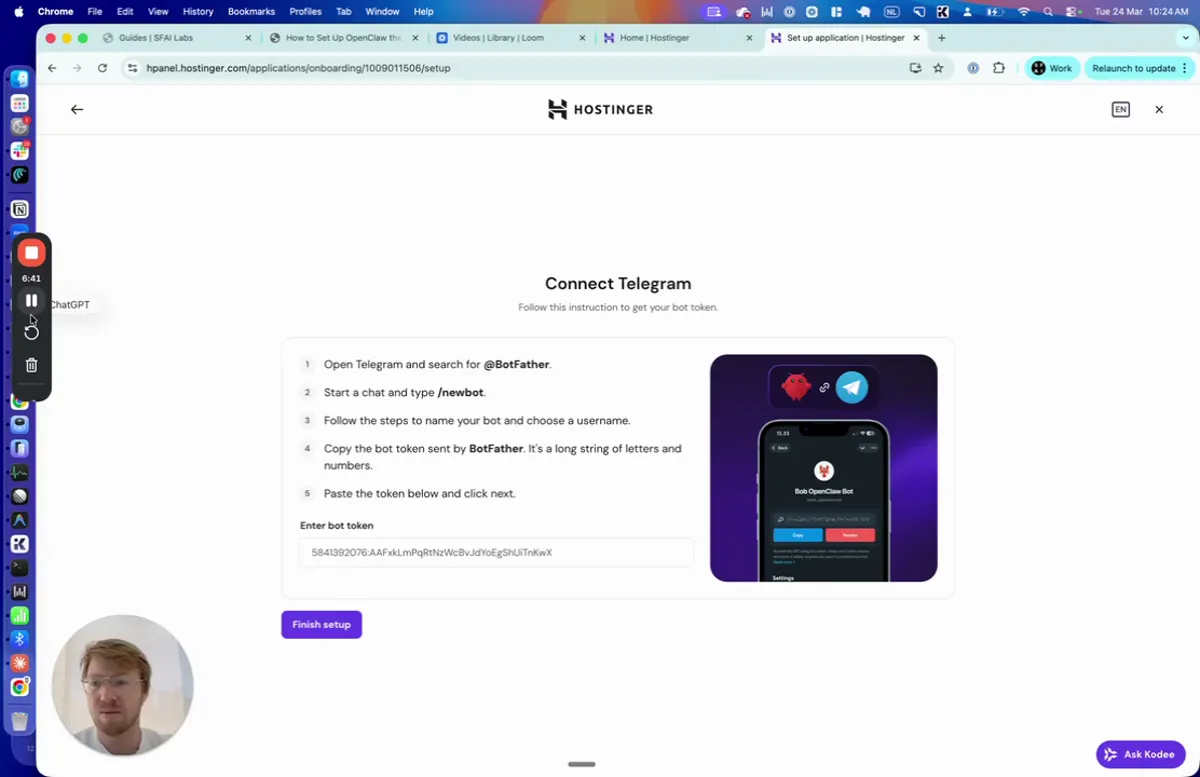
Follow these steps:
- Open Telegram on your phone
- Search for @BotFather (the official Telegram bot for creating bots)
- Send
/newbotto BotFather - Choose a name for your bot (this is the display name, like “My OpenClaw”)
- Choose a username for your bot (must end in “bot”, like “my_openclaw_bot”)
- BotFather responds with a bot token, a long string of characters that looks like
123456789:ABCdefGHIjklMNOpqrsTUVwxyz
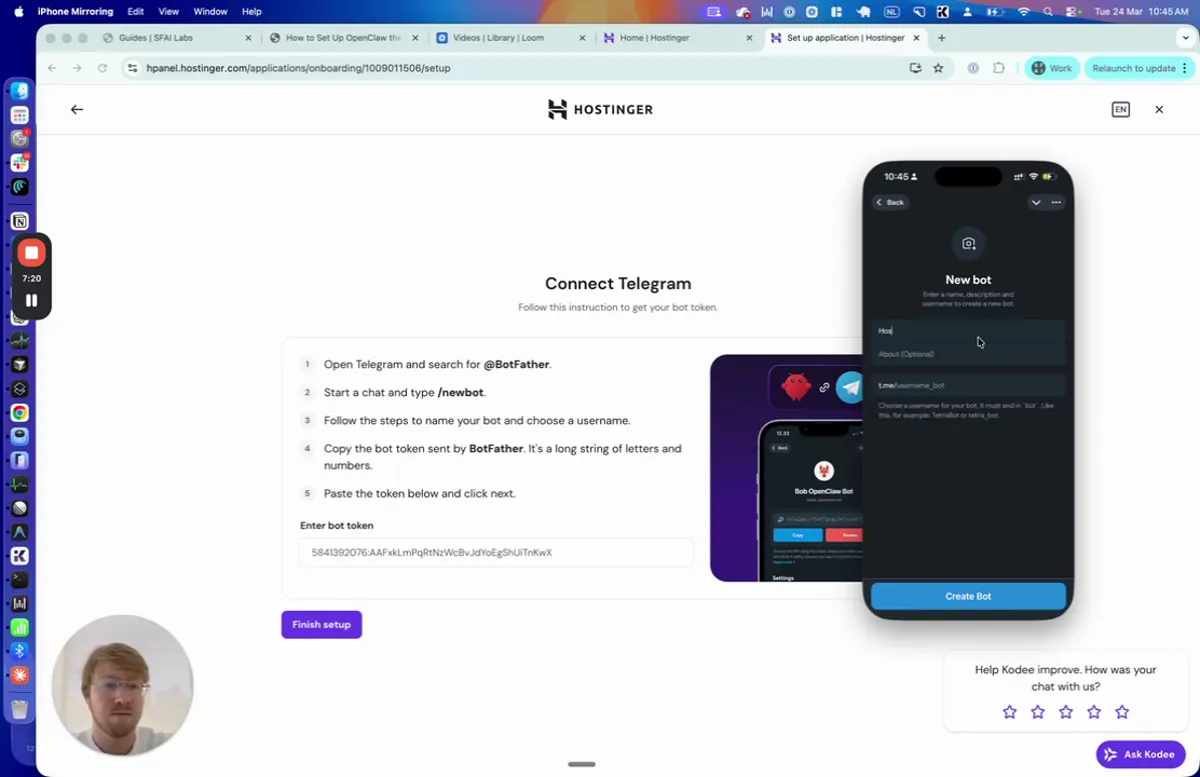
Copy the bot token from BotFather and paste it into the Hostinger setup wizard’s token field.
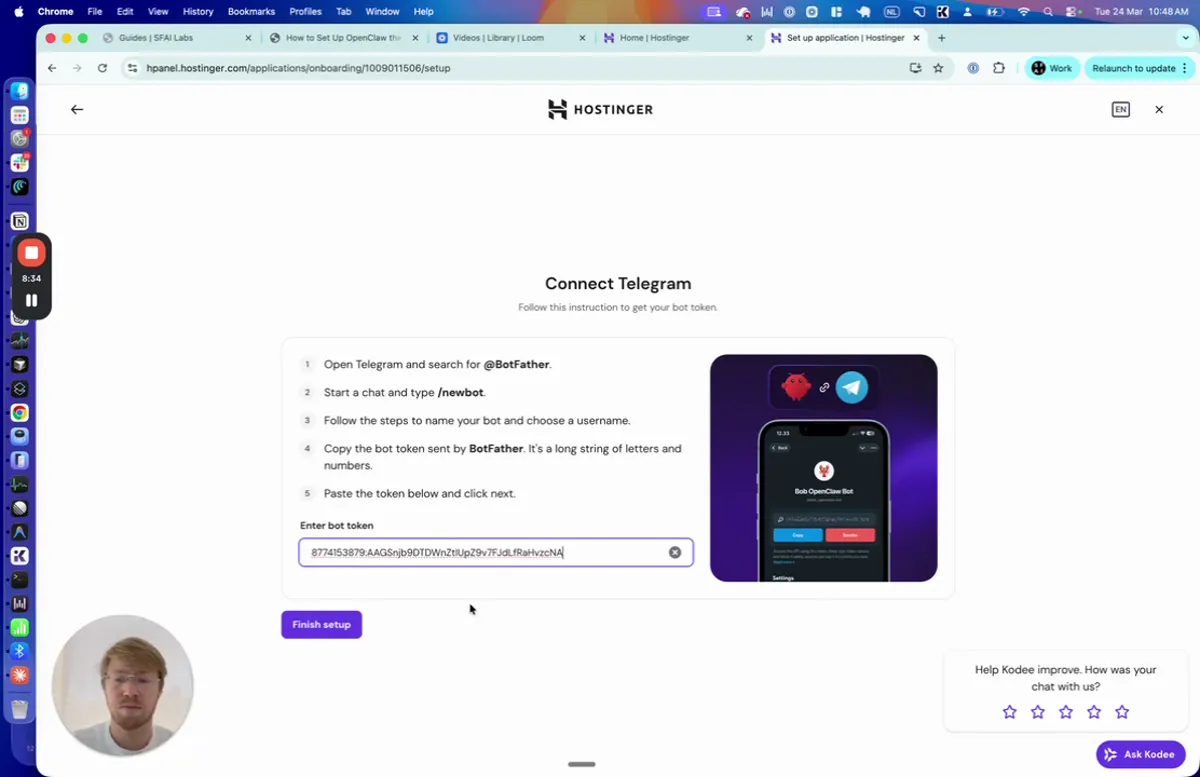
Click Finish setup to save the Telegram connection.
Step 6: Copy Your Access Key
After the Telegram connection is saved, Hostinger shows a confirmation screen with your access key. This key is how you authenticate with the OpenClaw management dashboard.
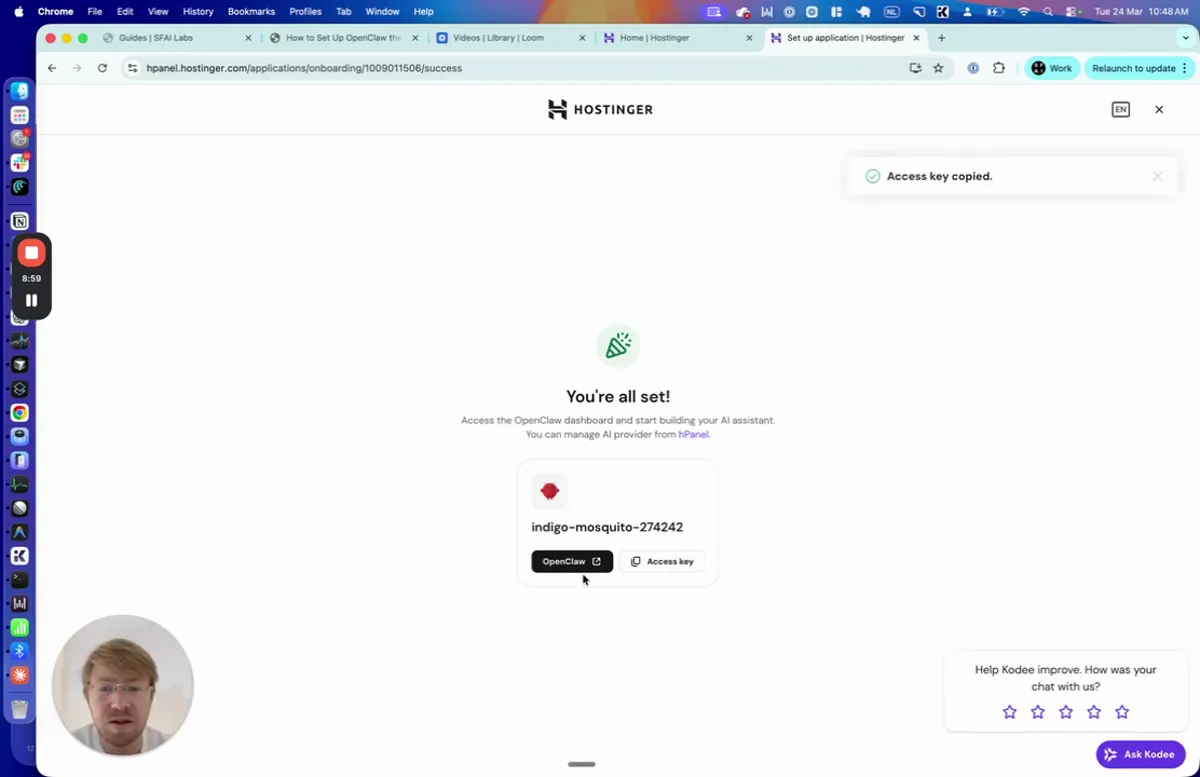
Copy the access key and store it somewhere safe. You will need it if you ever need to log into the OpenClaw dashboard from a different device or browser.
Step 7: Start OpenClaw and Verify It Is Running
Click the button to open the OpenClaw dashboard. The system begins initializing your instance. This takes approximately 30 seconds.
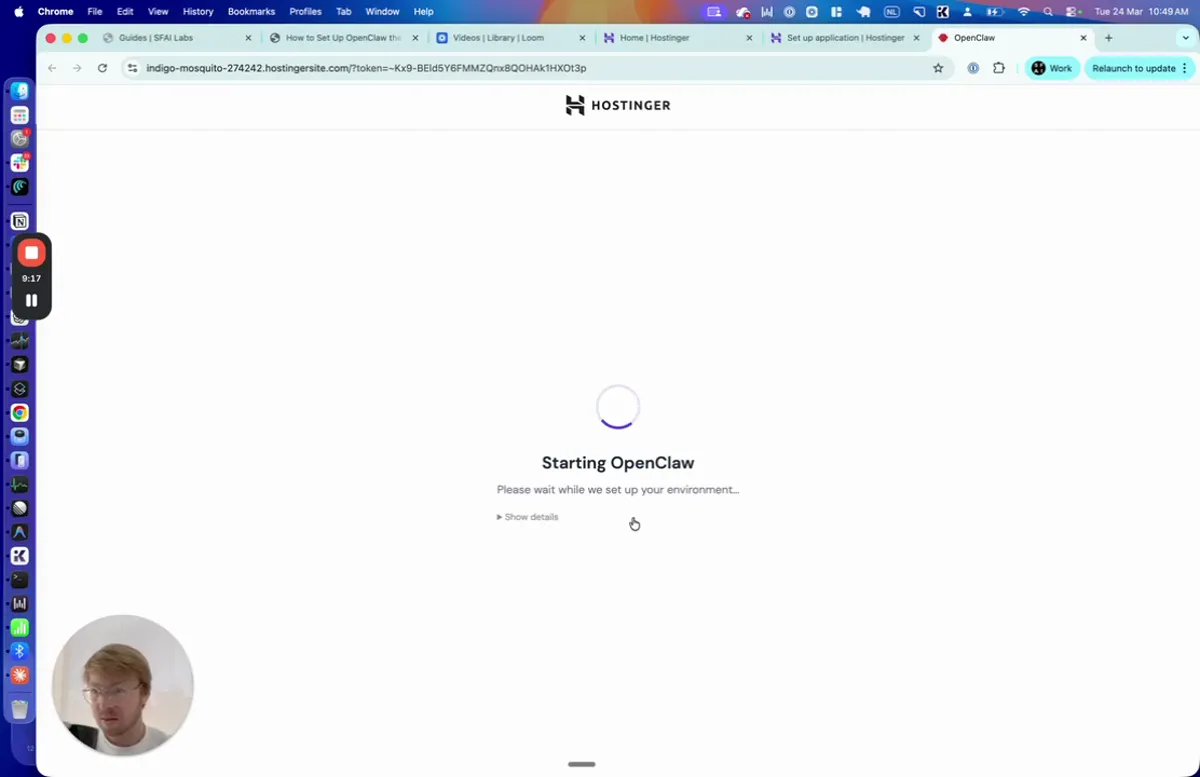
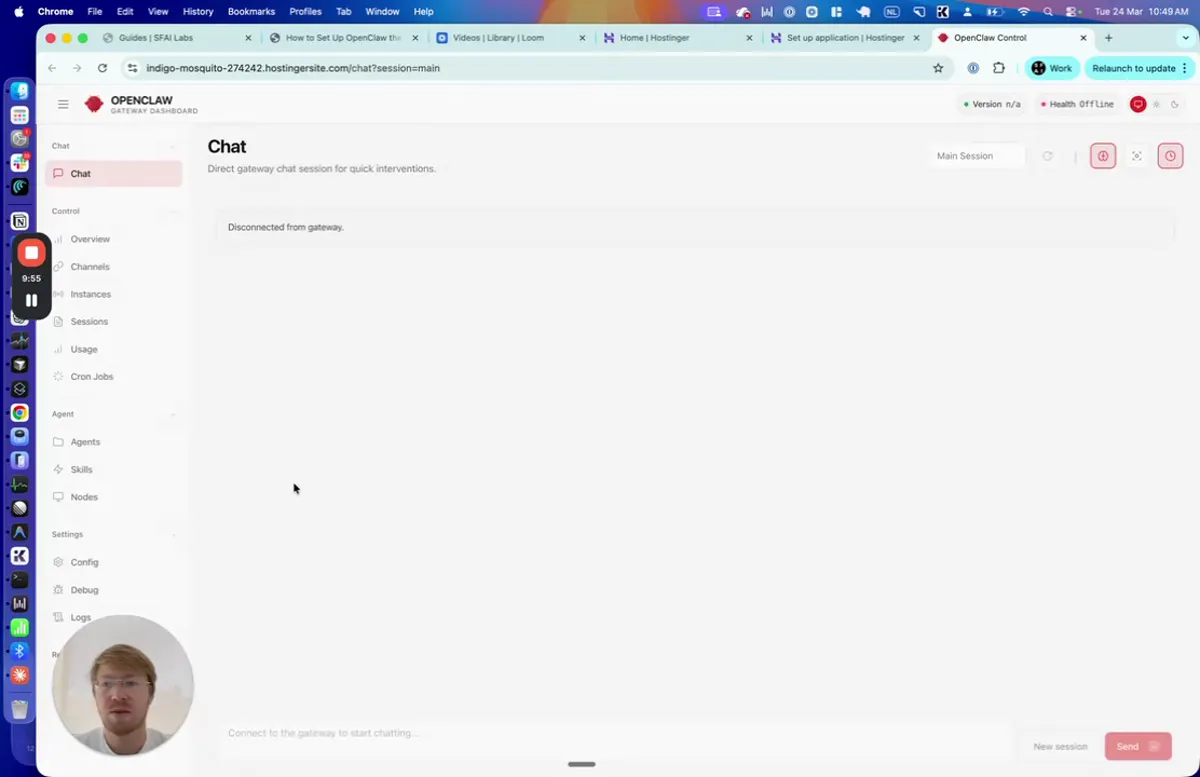
Once initialization finishes, you land on the OpenClaw Chat interface. This is the web-based dashboard where you can interact with your agent, manage settings, and monitor activity.
Your OpenClaw instance is now running. Open Telegram on your phone and send a message to your bot. If everything is connected, your agent will respond.
What to Do After Setup
The Hostinger one-click installer handles the hosting and deployment. But to turn OpenClaw into a useful assistant, you still need to configure its behavior, memory, and communication channels.
Our 10-step OpenClaw setup guide covers everything that comes after deployment:
- Personalize your workspace files (agents.md, soul.md, identity.md, user.md)
- Fix and optimize memory so your agent remembers conversations across sessions
- Set up the OAuth method for cost-effective model access
- Organize Telegram groups by topic so conversations stay clean
- Configure the heartbeat so your agent works proactively every 30 minutes
- Install skills from the built-in library or ClawHub marketplace
Since your OpenClaw is running on a VPS, the heartbeat and cron jobs will execute continuously. This is the main advantage over a local setup: your agent keeps working even when you are not at your computer.
Hostinger VPS vs. Other Hosting Options for OpenClaw
| Option | Setup difficulty | Monthly cost | 24/7 uptime | One-click install |
|---|---|---|---|---|
| Hostinger VPS | Minimal (browser-based) | ~$12/month | Yes | Yes |
| DigitalOcean Droplet | Moderate (SSH + manual install) | $6-12/month | Yes | No |
| Home server | High (hardware + networking) | $0 (electricity only) | Yes (if always on) | No |
| Local laptop | Low (curl command) | $0 | No | N/A |
Hostinger is the simplest path if you do not want to manage a server yourself. DigitalOcean and similar providers (Hetzner, Linode) give you more control but require terminal access and manual setup. A home server is the cheapest long-term option but needs hardware, a static IP or tunnel, and ongoing maintenance.
For most users who want OpenClaw running 24/7 with minimal effort, Hostinger’s one-click option is the fastest way to get there.
Frequently Asked Questions
How much does it cost to run OpenClaw on Hostinger? The introductory Hostinger plan is $6.99/month, renewing at $18/month after the first term. The effective average is approximately $12/month for the VPS alone. If you add the ChatGPT subscription hookup, that is an additional $20/month for your OpenAI account.
Can OpenClaw run 24/7 on Hostinger? A VPS stays online continuously. Your heartbeat, cron jobs, and Telegram bot all run around the clock without needing your laptop open.
Do I need technical knowledge to set this up? The entire setup happens in a web browser. Hostinger’s one-click installer handles server configuration, dependency installation, and process management. The only external step is creating a Telegram bot through BotFather, which takes two minutes.
Is the Hostinger OpenClaw setup secure? Hostinger provides baseline server hardening. For additional protection, follow the security recommendations in Step 9 of our OpenClaw setup guide, especially around prompt injection prevention and least-access principles.
What is the difference between this guide and the local OpenClaw setup guide? This guide covers deploying OpenClaw to a cloud VPS (Hostinger) for always-on operation. The local setup guide covers installing OpenClaw on your own laptop. After deployment through either method, the configuration steps (workspace files, memory, Telegram groups, heartbeat) are the same.
What to Do Next
- Send your first message to your OpenClaw Telegram bot to verify the connection works
- Read the 10-step setup guide to configure workspace files, memory, and heartbeat
- Fill in your
user.mdfile with your name, timezone, and goals - Create
memory.mdby telling your agent to start logging important information - Set up your heartbeat for memory maintenance, to-do tracking, and cron health checks
- Explore skills with
openclaw skills listin the chat interface
The hosting is done. Now make it useful.
SFAI Labs